Embarking on the journey of soap making can be an enjoyable and rewarding experience, offering a perfect blend of creativity and practicality. Crafting your own soap at home allows you to customize scents, colors, and textures, making each bar uniquely your own. To begin this delightful endeavor, gather the essential ingredients and tools to ensure a smooth process.
First, you'll need to select the base ingredients for your soap. Commonly used products in soap making are fats or oils that provide moisture and lather. Olive oil, coconut oil, palm oil, and shea butter are popular choices. Each oil imparts different qualities, such as hardness, lather, or moisturizing properties, enhancing the final product's attributes. Additionally, you'll require lye, a powerful alkali that reacts with the oils in a process called saponification to create soap. It is crucial to handle lye with care, as it can be caustic if mishandled.
To ensure safety throughout this process, protective gear is essential. Wear gloves and goggles to shield your skin and eyes from potential splashes. Working in a well-ventilated area is also ideal, as lye can release fumes when mixed with water. Depending on your recipe, you might want to prepare a dedicated workspace, laying down newspapers or plastic sheets to catch any spills and keep your area tidy.
Once your workspace is prepared and you have gathered the necessary tools, such as a soap mold, a digital scale for accurate measurements, a thermometer, and a stick blender for mixing, you can begin the soap-making process. Start by measuring out all your ingredients according to the chosen recipe; precision is key to ensure proper saponification.
Next, carefully mix the lye with distilled water in a heat-resistant container. Always add lye to water, not the other way around, to avoid dangerous reactions. Stir the mixture gently until the lye is completely dissolved, and then set it aside to cool. Monitor the temperatures of both the lye solution and the oils separately. Ideally, both should be at roughly similar temperatures, generally around one hundred degrees Fahrenheit, to ensure a successful blend.
As the lye cools, measure out your chosen oils. Combining different oils can give your soap varying properties, so you might experiment with different ratios until you find the combination you like best. Once the oils reach a suitable temperature, combine them into a large mixing bowl. Slowly and carefully pour the cooled lye solution into the oils, taking care to avoid any splashes.
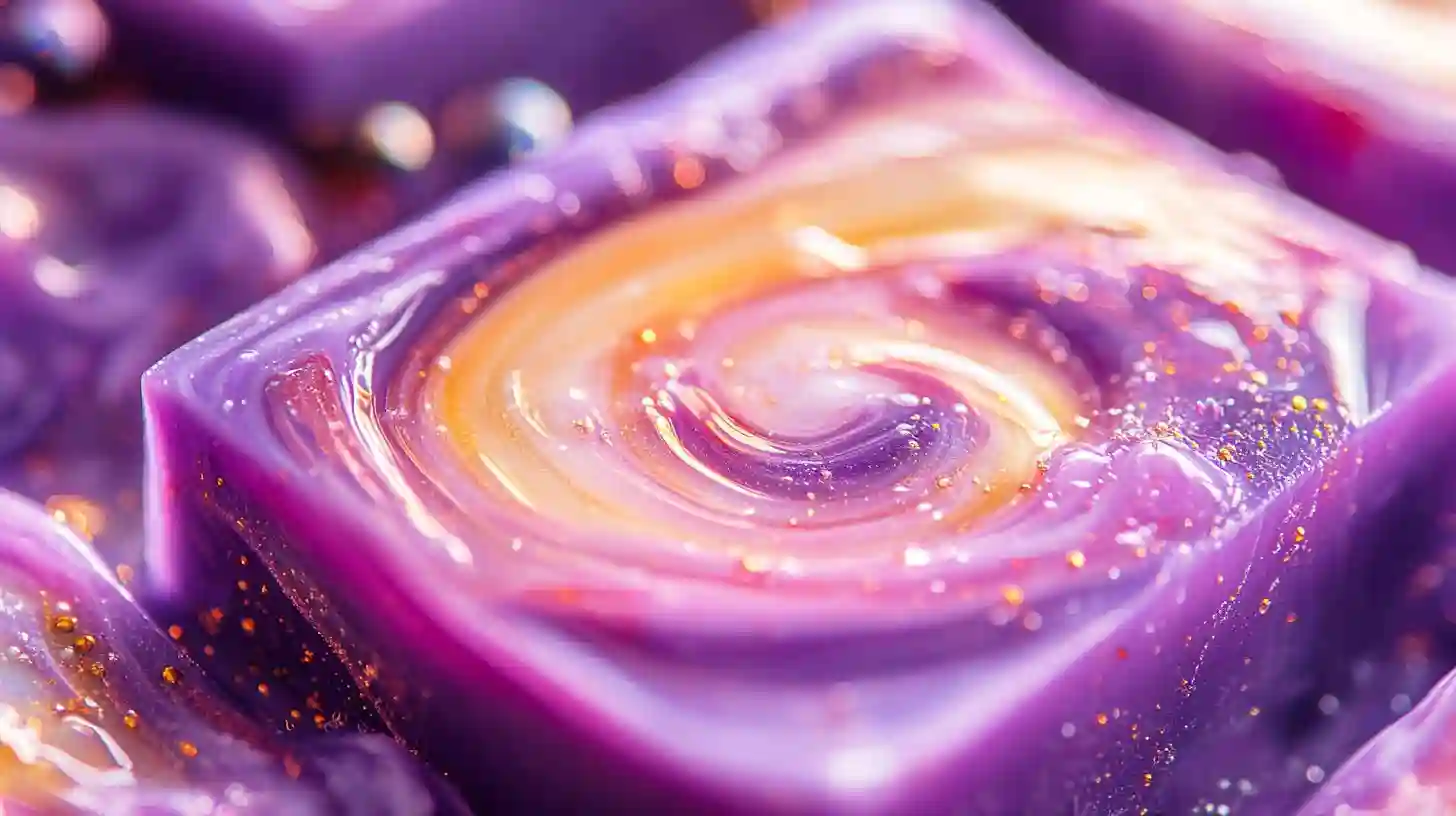
Now it's time to blend the mixture. Using the stick blender, pulse the mixture until it reaches "trace." Trace occurs when the mixture thickens to a pudding-like consistency, and a trail remains on the surface when drizzled over itself. This is a crucial stage, as it indicates that saponification is underway, and your oil and lye are well combined. At this point, you can add any additional ingredients you desire, such as essential oils, colorants, herbs, or exfoliants to enhance your soap’s aroma and aesthetic appeal.
After incorporating any extras, pour the soap mixture into your mold, smoothing the top with a spatula. If desired, you can sprinkle some herbs or flower petals on top for decoration. Cover the mold with plastic wrap and a towel to insulate it, allowing it to cure for twenty-four to forty-eight hours. This insulation helps to maintain a consistent temperature, promoting proper saponification.
Once the time has passed, check your soap to ensure it has hardened. If it feels solid to the touch, it’s time to unmold. Gently remove the soap from the mold and cut it into bars if necessary. Then, place the individual bars on a drying rack or a tray lined with parchment paper to cure for several weeks. This curing process allows excess moisture to evaporate, resulting in a harder, longer-lasting soap.
Throughout the curing period, resist the temptation to use your soap until it has fully hardened. Rushing this stage can result in a softer bar that dissolves quickly in water, leading to less desirable results. After four to six weeks, your soap will be ready for use, allowing you to enjoy the fruits of your labor or gift them to friends and family who will appreciate your handcrafted creations. With practice, you can refine your skills and explore a wide variety of techniques, recipes, and styles, making soap making not only a craft but also a fulfilling and enjoyable hobby.